What PSI should you use for airbrushing? There is no single pressure that works for every airbrush, paint and spray task. A practical starting point is often 10-18 PSI for reduced fine-detail material, 15-25 PSI for general work and 20-30 PSI for primer or broader coverage, but the correct value is the lowest pressure that atomizes the approved material cleanly and consistently.
This airbrush pressure guide explains how to find that value, why pressure must be read while air is flowing, and how nozzle size, paint viscosity, feed type and compressor capacity change the result. The ranges below are test starting points, not universal limits; follow the airbrush and coating instructions whenever they specify a different range.
Quick answer: start low and adjust under airflow
Set the regulator while pressing the airbrush trigger so the gauge shows working pressure, not only static line pressure. Begin near the lower end of the range appropriate for the material and task. Spray a test card at the intended distance, then increase pressure in small steps until the pattern becomes even without excessive overspray, bounce or dry texture.
Pressure is only one control. If paint remains too thick for the nozzle, simply raising PSI can hide the real preparation problem while increasing overspray. If the compressor cannot supply enough airflow, the gauge may fall during a long pass even though its no-flow reading looks high.
Record pressure with air flowing, test the prepared material on a card, and select the lowest stable setting that produces the required finish. That method is more repeatable than copying a number from another setup.
Ask about a compressor setupSend your question here
Tell YIDIAN what you need. You can start with a question; a company name, final quantity or finished specification is not required.
Static pressure and working pressure are different
Static pressure is the gauge reading when air is not leaving the system. Working pressure is the reading while the trigger is held down and air is moving through the hose, valve and air cap. Restrictions and compressor capacity can make working pressure lower than the static reading.
This difference explains why two users can report the same regulator setting but obtain different spray behavior. Hose length, small fittings, quick couplings, moisture filters, leaks and airbrush air consumption all affect pressure at the tool. For repeatable setup instructions, state where the gauge is located and whether the value was recorded under airflow.
Maximum compressor pressure is different again. It describes a limit or shut-off point, not the regulated air delivered continuously to the airbrush. Use our mini air compressor selection guide to compare delivered airflow, duty cycle, regulation and tank behavior.
Practical PSI starting points by spray task
| Spray task | Practical starting range | What to check on the test card |
|---|---|---|
| Fine detail with properly reduced material | 10-18 PSI | Clean start, narrow controlled line, no pooling at close distance |
| General model, illustration or craft work | 15-25 PSI | Even gradient, stable dots and consistent medium pass |
| Primer, thicker material or broader coverage | 20-30 PSI | Complete atomization without rough dry edges or excessive rebound |
| Siphon-feed or higher-volume coverage setup | 25-40 PSI | Reliable material pickup and stable pattern through a long pass |
These are conservative trial bands rather than product ratings. Some gravity-feed systems can operate below them, while particular bottom-feed models or thicker coatings may require more. Always verify the permitted range for the exact airbrush, compressor and material. For cosmetic, food, medical or regulated materials, follow the material supplier’s process and applicable hygiene requirements as well.
Miniature and Gunpla starter pressure checks
Airbrush PSI for miniatures should be selected from the test card, not copied from a forum number. Start with the paint maker’s guidance, set the regulator while air is flowing, then compare dots, lines, a small fill and a restart after a short pause. If the spray dries before it reaches the figure, reduce distance or pressure one step at a time.
Airbrush PSI for Gunpla changes between primer, base coats, shading and clear coats. A beginner airbrush pressure setting should therefore be written as a small test process: one material, one nozzle, one distance and one pressure change at a time. If the pattern fades during a long pass, check compressor recovery, hose restriction and leaks before asking the user to thin the paint further.
Pair this pressure record with the beginner nozzle choice and the starter kit gift checklist so a retail buyer can compare the complete setup rather than an isolated PSI value.
How nozzle size changes the pressure decision
Nozzle diameter affects material tolerance and airflow demand, but it does not create a fixed PSI by itself. A 0.2 mm setup is commonly chosen for fine control and thin material. It may work at relatively low pressure, yet it is less tolerant of coarse pigment, poor reduction and contamination. Increasing pressure cannot safely correct a damaged or blocked fine nozzle.
A 0.3 mm setup is a flexible middle option for many hobby, beauty and general creative applications. A 0.5 mm setup can pass heavier material and cover a wider area, but the compressor must provide enough air for the selected air-cap design. Needle taper, nozzle geometry and air-cap clearance mean that two airbrushes with the same nominal diameter can still behave differently.
Review the complete interaction in our 0.2 vs 0.3 vs 0.5 mm airbrush nozzle size guide. For sample approval, compare all nozzle options with the same prepared batch, test card, hose and regulator.
Paint preparation usually matters before more PSI
Viscosity, pigment size, reducer ratio and temperature affect how easily material passes through the airbrush. If the spray spits, stops or produces large droplets, first confirm that the paint is mixed, filtered and reduced according to its maker’s instructions. Also inspect the needle tip and nozzle for dried material.
Use the airbrush spitting troubleshooting guide to compare tip-dry, cap contamination, moisture, pressure and nozzle-sealing symptoms in a fixed order.
If a pressure change improves the spray for only a few passes before flow weakens again, check the airbrush keeps clogging troubleshooting chart. Recurring blockage is often a material, filtration or front-end cleanliness issue rather than a compressor setting alone.
Higher pressure can improve atomization of some heavier coatings, but it also increases overspray, bounce and material use. At close range it may create spidering, where wet paint is pushed outward across the surface. Lower pressure can improve control, but if it is too low the airbrush may produce coarse droplets, pulsing or unreliable material flow.
The goal is not the highest or lowest possible number. It is a stable combination of material preparation, nozzle size, distance and air pressure that produces the approved surface.
Gravity feed and siphon feed need different air support
A gravity-feed airbrush uses the material’s position above the nozzle to assist flow. This can support lower working pressure and small paint quantities. A siphon- or bottom-feed airbrush must create enough pressure difference to draw material from the bottle, so it commonly needs more airflow and pressure for dependable pickup.
Feed type therefore changes what PSI to use for airbrushing, especially when the same compressor is being considered for several airbrush platforms. Read our gravity feed vs siphon feed airbrush comparison for capacity, color-change and production tradeoffs, or use the gravity feed airbrush configuration guide for cup and component decisions.
How to set airbrush pressure step by step
- Assemble the final air path. Connect the intended compressor, regulator, moisture trap, hose, fittings and airbrush. Check for obvious leaks.
- Prepare one controlled material batch. Follow the coating maker’s reduction and safety instructions. Filter it when the process calls for filtration.
- Begin with a safe low setting. Use the lower part of the relevant trial range rather than starting at maximum pressure.
- Hold the trigger for air. Adjust the regulator while air is flowing and record the working reading.
- Spray a fixed test card. Include dots, fine lines, a gradient and a filled rectangle at the intended working distance.
- Change one variable at a time. Raise pressure in small increments. Do not change pressure, reduction and distance together.
- Run a longer pass. Confirm that pressure and pattern remain stable beyond the first few seconds.
- Save the approved setup. Record airbrush model, nozzle, material, reducer ratio, working PSI, distance and result.
For model work, combine this sequence with the surface preparation and spray exercises in our airbrush for model painting setup guide.
Diagnose low and high pressure symptoms
| Symptom | Possible pressure-related cause | Checks before changing PSI |
|---|---|---|
| Coarse droplets or weak atomization | Working pressure may be too low | Confirm reduction, nozzle cleanliness, leak-free fittings and airflow under load |
| Material will not rise from a bottom bottle | Insufficient pressure or airflow for pickup | Check vent hole, bottle seal, pickup tube, nozzle and siphon connection |
| Excessive mist and rebound | Pressure may be higher than the task needs | Confirm distance, trigger pull and that the material is not over-reduced |
| Spidering or runs at close range | Air may be pushing a wet film outward | Reduce paint flow, increase movement, check reduction, then lower pressure |
| Pattern fades during a long pass | Compressor cannot maintain working pressure | Inspect airflow rating, duty cycle, heat, leaks, hose and regulator behavior |
| Pulsing pattern | Unstable air supply is one possibility | Check compressor pulsation, tank, moisture, loose nozzle and material blockage |
Pressure should not be the automatic answer to every fault. Dried paint on the needle, a damaged nozzle, air leaks, poor bottle venting and incompatible seals can imitate pressure problems. Use the least invasive inspection first and follow our airbrush cleaning and troubleshooting SOP when contamination is suspected.
Run a pressure ladder before calling the compressor faulty
An airbrush pressure test card is more useful when it is built as a small ladder. Keep the same material, nozzle, distance and trigger movement, then record three working-pressure points while air is flowing. If the pattern improves only after a large jump, first confirm reduction and nozzle cleanliness. If the card still shows airbrush sputtering low pressure symptoms at every step, the fault may be in the material path rather than the regulator.
When an airbrush pressure drops while spraying report appears, record when the drop begins: immediately, after a long fill, or only after the compressor warms. A steady small difference between static and working pressure is not the same as a progressive fall. Compare the result with the compressor guide, then inspect leaks, hose restriction, filter condition and run/rest behavior without bypassing any safety device.
For airbrush compressor pulsing troubleshooting, separate air-source rhythm from paint pickup. Spray clean test liquid at a fixed setting, then repeat with prepared paint. If both pulse, inspect the air path and front-end sealing; if only paint pulses, check cup feed, bottle venting, reduction and nozzle cleanliness. The spitting and pulsing diagnostic card and the cup-bubble leak test help keep those paths separate.
When pulsing follows a pressure drop
An airbrush pulsing pressure drop report should record whether the gauge drops once and settles, or rises and falls in a repeating rhythm. A steady settled value belongs in the pressure ladder; a repeating pulse needs a separate air-only, clean-liquid and paint comparison. Use the dedicated airbrush pulsing diagnostic sequence when the rhythm may involve the compressor, regulator, hose, head seal or paint path together.
Compressor specifications that support stable PSI
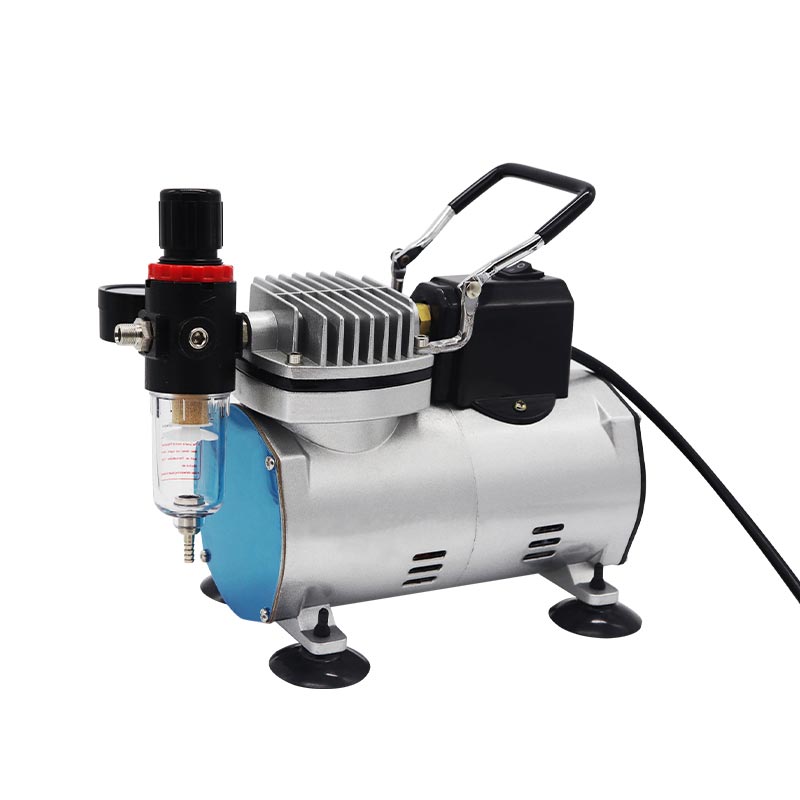
For buyers, the most useful compressor data is delivered airflow and pressure under the intended load. A maximum-pressure number cannot establish the pressure available at an airbrush during a long pass. Request a check with the actual nozzle, coating and hose, and record the gauge location and whether air was flowing.
| ONEINDIG catalog model | Published information | What to verify for your setup |
|---|---|---|
| TC-20T | Maximum pressure: 6.5 bar / 95 PSI. Listed airflow: 23–25 L/min. Air tank: 3.0 L. | Regulated pressure while your airbrush is releasing air, recovery between passes and the selected power version. |
| TC-18F | Maximum pressure: 6.5 bar / 95 PSI. Listed airflow: 23–25 L/min. | The same under-flow check; do not infer equal sustained performance from matching headline specifications. |
These are current catalog entries, not measured output from a ONEINDIG comparison test. The listing does not give the test conditions for the airflow figure, so request pressure and duty-cycle evidence before treating it as delivered flow. Record session length, hose restrictions and condensate management with the compressor selection guide and moisture-trap guide.
Iwata’s compressor operating manual illustrates reading and adjusting pressure while the connected airbrush releases air. Use that measurement method, then follow the instructions for the equipment you actually own. If your configuration remains uncertain, send the model, nozzle and working-pressure question before ordering.
Create a pressure test for OEM and wholesale samples
A useful sample report should show more than “sprays normally.” Define one approved paint or safe test medium, reduction method, nozzle, hose, regulator and card. Record static pressure, working pressure and any drop during a timed pass. Then compare dot start, fine-line control, gradient smoothness, filled-area consistency and cleanup recovery.
Repeat the sequence on multiple samples and after disassembly. If a kit includes more than one nozzle, test every configuration. The approved pressure window should be written into the user guide only after the final compressor and air path have been confirmed.
Add pressure evidence to the airbrush series brief
An airbrush series pressure setup brief should list the working-pressure test method for each model in a range, not one headline PSI for every SKU. Record nozzle size, feed style, hose, regulator location, material category and whether the reading was taken with air flowing. This helps the buyer compare a detail airbrush, a starter kit and a coverage-focused option without mixing static and working pressure.
Airbrush compressor pairing evidence should come from the final or representative air path. Check whether the compressor holds the selected working pressure during dots, lines, gradients and a longer fill, then repeat after the unit has warmed within its permitted operating pattern. Do not treat an unloaded maximum-pressure number as proof that the kit can support every nozzle or bottle configuration.
An airbrush pressure test acceptance card should stay blank where observations are missing. Use it to connect the pressure result to the compressor selection guide, the nozzle size guide and the complete kit checklist before adding pressure language to a manual or buyer file.
Airbrush PSI FAQ
What is the best airbrush pressure for acrylic paint?
There is no universal acrylic setting because formulations, reduction ratios and pigment sizes differ. Many general applications begin testing around 15-25 PSI, then adjust under airflow according to the paint instructions, nozzle and desired surface.
Should I read the gauge with the trigger pressed?
Yes. Hold the trigger for air and set the regulator while air is flowing. This displays working pressure and reveals pressure drop through the complete system.
Does a smaller nozzle always need lower PSI?
No. A small nozzle can support fine low-pressure work with properly reduced material, but paint preparation and air-cap design matter. A partial blockage may require cleaning, not more pressure.
Why does my PSI fall while spraying?
The compressor may not supply the required airflow, or the air path may contain a leak or restriction. Check the regulator, fittings, hose, filter, compressor temperature and duty cycle with the trigger held open.
Airbrush pressure drop test: record the change, not just one number
If you find that airbrush pressure drops when spraying, distinguish a reading that settles from one that continues to fall. A comparison of static vs working airbrush pressure is meaningful only at the same gauge location, with the same hose, fittings and operating conditions. There is no universal acceptable pressure-drop number for every kit.
- Record the no-flow reading, then the initial and settled readings with air flowing. Choose a duration within the equipment’s operating limits.
- If the reading settles and the spray remains repeatable, compare the result with the equipment and coating requirements before calling the difference a fault.
- If it keeps falling, record when that happens, motor behavior and the exact air path. Check the manual’s permitted run/rest pattern and external leak/connection checks before requesting service.
The airbrush regulator pressure setting should be adjusted under the operating conditions specified by its maker. For example, the Sparmax TC-610H Plus manual calls for adjustment with the connected airbrush trigger pressed. Its model-specific pressure and runtime limits are not YIDIAN product ratings.
Download the blank pressure log to keep observations separate from conclusions. Do not loosen pressurized parts or bypass safety devices. Use the compressor comparison record for supply questions; use the paint-flow diagnosis if air is steady but paint delivery is not.
Create a pressure recovery handoff before changing parts
An airbrush pressure recovery observation card is useful when pressure falls, returns slowly or changes after the compressor warms. Record a static reading, a working reading with the trigger held open, the elapsed time, the hose and filter in use, and whether the pattern on the card changed at the same moment. Without that sequence, a buyer cannot tell whether the issue is regulator behavior, compressor recovery, a leak, a hose restriction or paint flow.
| Observation | Record before deciding | Do not assume |
|---|---|---|
| Regulator drift during airbrush spraying | Gauge location, adjustment method, airflow state and whether the value settles or continues moving | That a single no-flow gauge number proves stable spray pressure. |
| Pressure drop retest after hose change | Old hose, new hose, fittings, quick connector, filter, same spray card and same material | That the compressor improved or failed if multiple accessories changed at once. |
| Airbrush PSI support handoff | Selected working range, material category, nozzle, session pattern and unresolved checks | That support can recommend a fixed PSI without the complete air path. |
When the record points toward the air supply, compare it with the compressor sample release file. When the same pressure record shows moisture marks, use the wet-hose incident log. If air remains stable but material stops, route the case to clogging or no-flow diagnosis instead of asking the user to increase pressure blindly.
Route pressure-only questions into a buyer handoff
An airbrush pressure buyer handoff should not ask for one magic PSI number. It should name the airbrush model or target kit, nozzle size, material family, compressor or regulator in use, working pressure under airflow, session length and the exact symptom on the card. This turns a pressure-only visitor into a request that a supplier can answer without guessing the complete air path.
For an airbrush pressure quote readiness path, attach the pressure ladder, note whether the compressor holds pressure during a longer pass, and say whether the buyer is choosing an airbrush, a compressor or a complete set. If the question is mainly about air supply, use the air-system inquiry route. If the buyer is comparing a full starter or retail kit, review the complete kit range before sending the request.
Approve a working range, not a headline number
When deciding what PSI to use for airbrushing, treat pressure as part of a tested system. Start low, adjust under airflow, verify on a fixed card and record the lowest stable setting that atomizes the target material. That process creates a more useful result than repeating an isolated specification.
YIDIAN develops airbrush, mini compressor and complete-kit configurations for OEM and private-label programs. Share your nozzle range, target material, working pressure and session length to build a sample plan with measurable pressure and spray checks.