Why is my airbrush spitting paint instead of producing a clean, even pattern? The most common causes are dried material on the needle tip, paint that is too thick for the nozzle, low or unstable working pressure, contamination inside the head, moisture in the air line, or a damaged or poorly seated nozzle.
The fastest fix is not to increase pressure blindly or disassemble the entire airbrush. First isolate whether the fault follows the paint, the air supply or the airbrush itself. This guide uses a controlled test-card method so operators, distributors and service teams can identify the cause without creating a second problem.
Quick answer: check these six points first
- Clean the exposed needle tip. Tip-dry can interrupt material flow and throw larger droplets.
- Test the prepared paint. Mix, reduce and strain it according to the material maker’s instructions.
- Read pressure under airflow. Hold the trigger for air while setting the regulator.
- Inspect the needle cap and nozzle area. Remove visible build-up without forcing tools into the nozzle.
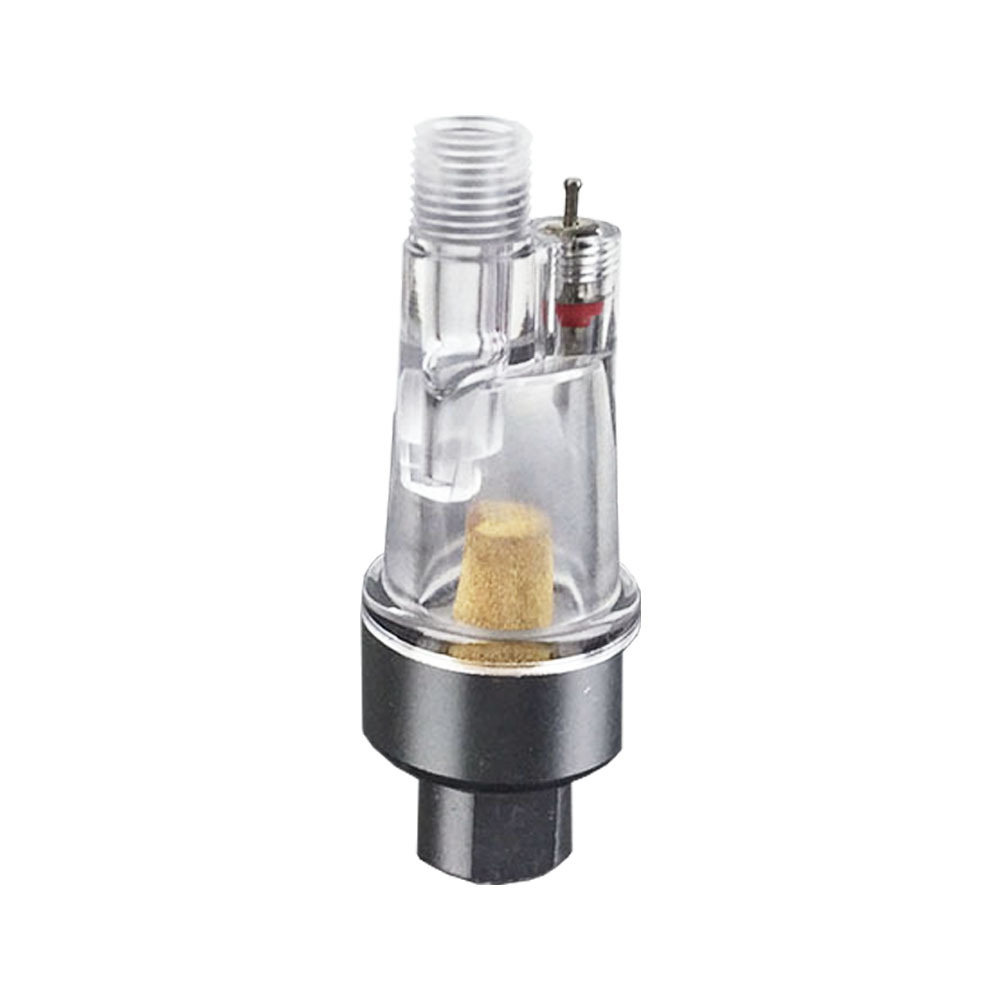
- Drain the moisture trap. Condensed water can travel through the hose and appear as intermittent clear or diluted spits.
- Check nozzle seating and damage. A cracked nozzle or leaking head connection needs correction, not more pressure.
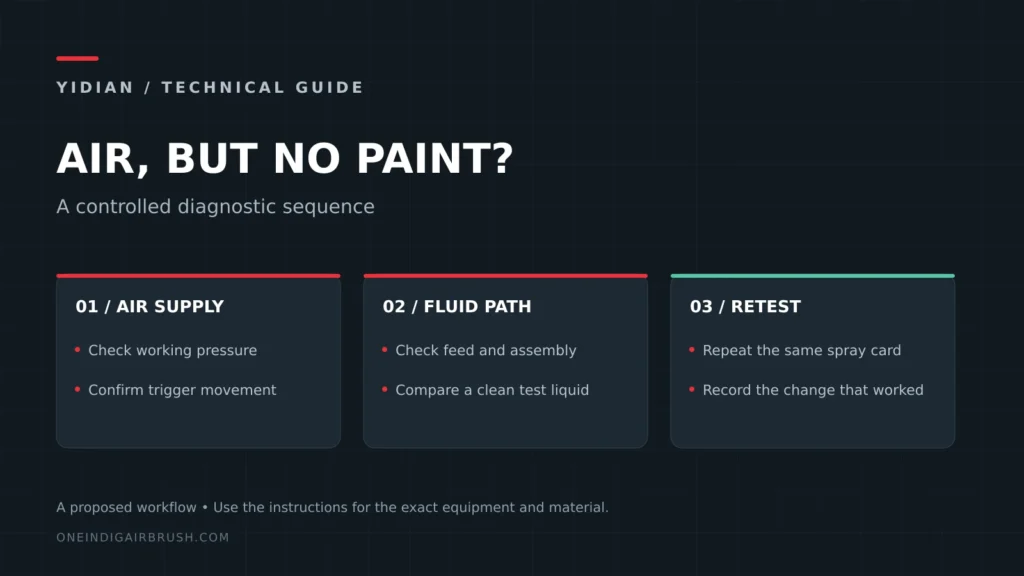
Change one variable at a time and spray the same test card after every change. If you clean, thin the paint and raise pressure together, you will not know which action solved the fault.
First-use checks for miniature and Gunpla spitting
Airbrush spitting on miniatures often appears during the first primer or base-coat session, when a new user is still learning pressure, distance, paint preparation and trigger sequence at the same time. Treat the model part as the final confirmation, not the first test surface. Spray a card first, then move to the miniature only after the line, dot and restart checks are repeatable.
If the complaint is airbrush spitting after first use, ask what changed between the opening test and the second session: dried paint in the cap, cleaner left in the passage, a shifted needle, moisture in the hose or thicker paint from an open cup can all create a new blob. Link the support note to the starter model setup, the beginner nozzle choice and the miniature pressure check before recommending spare parts.
A practical beginner airbrush splatter troubleshooting handoff is a short evidence list: material brand and type, nozzle size, pressure under airflow, whether the trap was drained, a photo of the test card and whether bubbles appeared in the cup. That record helps a distributor decide whether the issue belongs to user setup, material preparation, air supply or sample inspection.
Spitting, splattering, skipping and pulsing are different clues
Operators often use “spitting” for every uneven pattern, but the timing and appearance of the fault point to different causes. Spattering is a field of coarse droplets mixed with the normal spray. Skipping is an interrupted line or repeated weak spots. A single blob at the beginning or end of a stroke can come from trigger timing. Pulsing is a rhythmic change in output that may follow the air source, a leak, a loose head or material pickup.
| Observed symptom | Likely first checks | Useful isolation test |
|---|---|---|
| Coarse paint droplets throughout the pass | Tip-dry, thick paint, low pressure, dirty needle cap | Clean the tip and spray correctly prepared material on a fresh card |
| One wet spit after a pause | Material collected in the cap, condensation, trigger sequence | Blot the cap, drain the trap and restart with air before paint |
| Repeated gaps or weak sections | Tip-dry, partial blockage, bottle vent or unstable supply | Spray water or approved cleaner, then compare under constant air |
| Rhythmic pulsing | Loose head, poor nozzle seating, air leak, compressor ripple | Check connections and compare with another known-good air source |
| Bubbles in the gravity cup | Air leaking back around the nozzle or head | Inspect seating, cap tightness and nozzle condition |
When to move from spitting to pulsing diagnosis
Airbrush pulsing vs spitting is a timing question. Spitting usually appears as one blob or random droplets; pulsing repeats in a rhythm that may match compressor cycling, pressure movement, cup backflow or paint pickup. If a labelled card shows a repeat interval, keep the evidence and move to the airbrush pulsing diagnostic sequence before replacing the nozzle.
Use one card to separate spitting, sputtering and pulsing
A useful airbrush sputtering troubleshooting routine starts with one labelled card, not a full teardown. Mark four passes on the same sheet: a three-second air-only pass, a row of dots, a slow line and a ten-second fill. If the first pass is clean but paint breaks up later, the material path deserves more attention. If every pass changes rhythmically, record it as airbrush pulsing paint flow and check pressure stability, a loose head, the nozzle seal and possible pickup restriction.
When an airbrush spitting after cleaning complaint appears, compare the current card with the card made before cleaning. A new blob at restart can come from cleaner left in the cap, a needle that was not seated naturally, or a small nozzle shifted during reassembly. Do not tighten fine parts harder to force a result; return to the cleaning and reassembly SOP, then retest with the same pressure and liquid.
For service teams, an airbrush spatter test card should note the material, reduction, nozzle set, pressure under flow, moisture-trap condition and whether cup bubbles were present. If bubbling appears on the card sequence, move to the cup backflow diagnostic; if pressure falls through the long pass, use the pressure-drop record. Keep the marked card with the sample record before requesting replacement parts.
Turn a spitting report into a sample request
An airbrush spitting sample request should not start from a generic complaint. A buyer or service team should show whether the fault followed the paint, the air supply, the front-end parts or the restart technique. That evidence makes the request easier to route to an airbrush, compressor, accessory or complete-kit review.
- Attach one airbrush spatter evidence packet: material, reducer, nozzle size, working pressure under airflow, moisture-trap status and a photo of the test card.
- State whether clean liquid sprays normally and whether bubbles, pulsing or weak flow appeared during the same test.
- List the current airbrush model, replacement parts already installed and the intended application before asking for a new sample.
For distributor or private-label review, treat the packet as an airbrush splatter supplier handoff. Send the card, model and target use through the replacement-parts request form, then keep the result connected to the sample QC evidence pack.
If the same complaint is tied to an application rather than a known replacement part, record it as an airbrush spitting application handoff: target use, material, nozzle, air source, moisture check and whether the fault appears during first setup, restart or long-pass spraying. Route that note through the application request brief matrix before deciding whether the buyer needs a parts review, an air-system review or a complete-kit sample.
A splatter evidence parts request should stay evidence-led. Attach the card and current setup, then ask the open question through the parts inquiry path instead of assuming that a nozzle, needle or compressor replacement will solve every splatter report.
Cause 1: dried paint on the needle tip
Tip-dry is the first place to look because it is common and visible. Fast-drying material collects on the exposed needle and changes how paint leaves the nozzle. The build-up can bend the spray to one side, interrupt a fine line or release suddenly as a coarse droplet.
Stop material flow while maintaining the safe procedure for the medium. Use the cleaner and soft applicator approved by the paint and airbrush makers. Work away from the sharp needle point and do not pull or bend it. If tip-dry returns immediately, check reduction, drying conditions, working distance and air pressure rather than repeatedly scraping the needle.
When the same tip-dry pattern turns into weak or blocked flow every few minutes, follow the airbrush keeps clogging checklist before replacing a nozzle. The repeated timing can point to material preparation, filtration, environment or hidden residue rather than a simple spray-technique fault.
For a complete maintenance sequence, follow our airbrush cleaning and maintenance SOP. Deep cleaning should follow quick external checks, not replace them.
Cause 2: paint is too thick or contains coarse material
A nozzle can only pass material prepared for its diameter and head design. Thick paint may leave the cup but fail to atomize evenly. Settled pigment, skin from an open bottle or unmixed additives can create intermittent obstruction even when the average viscosity looks acceptable.
Follow the coating supplier’s reduction range and compatible thinner. Mix thoroughly and strain when the process calls for it. Do not assume that every acrylic, ink, primer or food-safe material behaves the same. Temperature and storage history can change viscosity.
A fine 0.2 mm setup is less tolerant of coarse pigment than a larger general-purpose option. Use the 0.2 vs 0.3 vs 0.5 mm nozzle guide to match material tolerance and spray task before changing hardware.
Cause 3: working pressure is too low or unstable
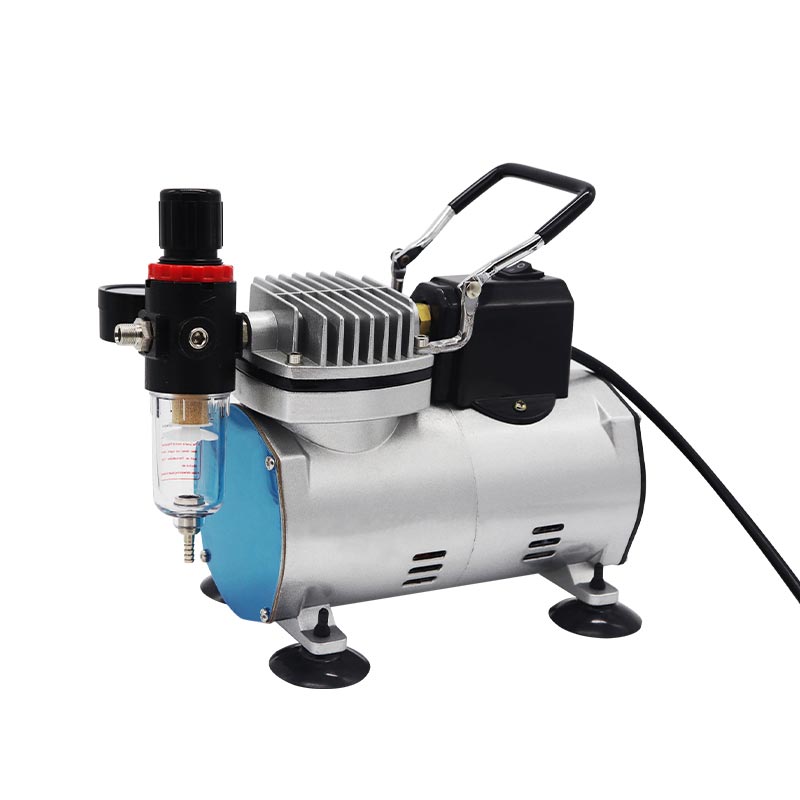
Low working pressure can produce coarse droplets because the available air does not atomize the prepared material consistently. The important measurement is the regulator reading while air is flowing. A static gauge may look correct and then fall when the trigger is held open.
Raise pressure only in small controlled steps after confirming paint preparation and cleanliness. Excessive pressure can create overspray, dry texture, bounce and spidering, so “more PSI” is not a universal repair. If pressure continues to fall during a long pass, inspect the compressor’s delivered airflow, hose restriction, fittings, leaks and duty cycle.
See the airbrush pressure guide for working-pressure ranges and a repeatable adjustment method.
Cause 4: material has collected inside the needle cap
Overspray and tip-dry can accumulate inside the protective cap. A wet deposit near the air stream may be released after the airbrush pauses, creating one unexpected blob on the next pass. This often looks different from continuous coarse atomization.
Inspect and clean the cap with the correct material-safe method. Confirm that the cap is installed in its intended position and that the needle is not contacting it. Avoid enlarging holes or using a hard tool that can change the air-cap geometry.
Cause 5: moisture has entered the air line
Compressing warm humid air can create condensation. A moisture trap separates water before it reaches the hose, but it must be installed in the right direction, kept upright and drained before the collected level becomes a problem. In hot or humid conditions, one trap at the regulator may need support from a secondary point-of-use filter.
Moisture-related spitting may appear intermittently after the compressor has warmed up. The droplet can look clearer or more diluted than the paint around it. Drain the trap safely, inspect the hose and tank where applicable, and retest with clean material. Our airbrush moisture trap guide covers placement, draining and humidity control.
Cause 6: the nozzle is loose, poorly seated or damaged
A tiny crack, distorted opening or leaking nozzle-to-body connection can disrupt the pressure balance at the head. Symptoms may include bubbles in the cup, an off-center pattern, skipping or pulsation. A bent needle can also prevent the nozzle from closing concentrically.
Depressurize the system and follow the airbrush maker’s service instructions. Inspect the needle and nozzle under good light. Do not overtighten a fine threaded nozzle; excessive force can damage it or leave the threaded section in the body. Replace matched needle and nozzle parts when the maker specifies a set.
Cause 7: trigger timing creates blobs at the ends of strokes
Some defects are technique rather than hardware. For a dual-action airbrush, establish air before introducing paint, keep the hand moving through the pass, stop paint flow, and then release air. Releasing the trigger abruptly or starting paint while the airbrush is stationary can leave heavier dots at the ends of a line.
Practice the same motion on a test card using dots, straight lines, gradients and filled rectangles. If the defect disappears with a slower controlled trigger sequence, disassembly is unnecessary.
A ten-minute diagnostic sequence
- Save the evidence. Mark the faulty spray on a card and note material, reduction, nozzle and working PSI.
- Inspect the needle tip and cap. Remove only visible build-up with the approved cleaner.
- Drain the trap. Turn off and depressurize equipment according to the compressor instructions before service.
- Check pressure under airflow. Look for a stable gauge reading through a ten-second pass.
- Test water or approved cleaner. A clean test helps separate paint preparation from mechanical faults.
- Prepare a fresh small paint batch. Mix, reduce and strain consistently.
- Retest at fixed distance. Change only one variable between cards.
- Inspect nozzle seating last. Disassemble only if the non-invasive checks do not solve the problem.
Diagnostic matrix for service teams
| Test result | Most likely area | Next controlled action |
|---|---|---|
| Water sprays cleanly but paint spits | Viscosity, pigment, reduction or paint contamination | Prepare a fresh approved batch and verify nozzle suitability |
| Water and paint both spit | Air supply, contamination, nozzle or head sealing | Drain moisture, inspect pressure and examine head components |
| Fault begins only after the compressor warms | Condensation, heat or duty-cycle limitation | Inspect trap, tank, ventilation and sustained airflow |
| Bubbles appear in the cup | Nozzle/head leakage or damage | Reseat and inspect parts according to the service manual |
| Pattern is clean after tip wipe, then fails quickly | Recurring tip-dry | Review reducer, drying time, distance and environment |
Prevent spitting in an OEM or wholesale kit
For a branded kit, prevention begins before packing. Match compressor airflow to the final nozzle and feed type. Include a regulator and moisture control suited to the intended climate. Verify that hose and adaptor combinations do not create large restrictions or slow leaks.
Run a controlled spray card on samples from multiple production lots. Record fine-line start, gradient, broad fill, restart after a pause and a sustained pass. Repeat the test after cleaning and reassembly. Replacement needles and nozzles should be lot-controlled and fit without forcing.
Instructions should distinguish a quick tip clean, a color-change flush, an end-of-session clean and a true deep clean. A complete kit also benefits from a holder, compatible cleaner guidance and a test-card pattern. Use our complete airbrush kit checklist to review the whole system.
Airbrush spitting FAQ
Why does my airbrush spit when I first press the trigger?
Material may have collected in the needle cap, condensation may be present in the line, or paint flow may begin before stable air. Clean the cap, drain the trap and test the air-then-paint trigger sequence.
Can low PSI make an airbrush splatter?
Yes. If working pressure is too low for the prepared material and nozzle, atomization can become coarse. Confirm pressure with air flowing and correct paint preparation before increasing it.
Why does the cup bubble when I spray?
Air is likely leaking back around the nozzle or head because a cap is loose, a nozzle is poorly seated, or a fine component is damaged. Follow the maker’s inspection procedure, avoid overtightening, and use the dedicated airbrush cup-bubbling diagnostic sequence to isolate the seal, blockage or component fault.
Should I replace the nozzle immediately?
No. Begin with tip cleaning, fresh material, working-pressure and moisture checks. Replace the nozzle when inspection shows damage or the documented service procedure confirms that cleaning and correct seating do not restore the pattern.
Fix the cause, then record the working setup
When an airbrush spits, use the pattern as evidence. Start with the needle tip, paint preparation, pressure and moisture, then move to nozzle seating and component condition. A fixed test card and one-variable-at-a-time method produce a faster and more repeatable diagnosis than random adjustment.
YIDIAN supports airbrush, compressor and complete-kit programs for distributors and private-label brands. Send the material, nozzle, working pressure, fault pattern and order quantity to define a sample and quality-control test plan.
Technical references: Iwata airbrush troubleshooting procedures and the Iwata airbrush cleaning guide.