An airbrush moisture trap removes condensed water and debris from compressed air before they reach the airbrush. It helps prevent sudden wet spits, diluted paint spots and corrosion, especially during long sessions or in warm, humid rooms. The trap works only when it is correctly positioned, kept upright, inspected and drained.
This guide explains where to install an airbrush water trap, how to set the regulator with air flowing, when a second point-of-use filter helps, and what distributors should test when specifying a compressor or complete airbrush kit.
Quick answer: install, inspect and drain
- Place the primary trap after the compressor outlet. The airflow arrow must point toward the hose and airbrush.
- Mount the clear bowl vertically. Separation and draining depend on the intended orientation.
- Set pressure while the trigger is held for air. This gives the working PSI through the complete filter and hose.
- Watch for droplets. Drain collected moisture before it rises far enough to travel downstream.
- Service the tank and filter safely. Turn off, unplug and release stored pressure according to the compressor manual.
- Add point-of-use protection when needed. A small filter near the airbrush can provide a final barrier in humid or long-hose setups.
A moisture trap is not a dryer that removes all water vapor. It separates liquid droplets and particles. Temperature, humidity, tank condition, hose routing and session length still affect condensation.
Why compressed air produces water
Ambient air contains water vapor. Compression raises air temperature, and the air cools again as it moves through a tank, regulator and hose. Cooling reduces how much vapor the air can hold, so liquid water can condense on cooler surfaces.
Humidity and temperature increase the risk. A compressor that runs continuously also becomes warm, while a long hose may cool the air further downstream. This is why a system can spray normally at the beginning of a session and release a wet spit later.
The moisture trap creates a flow path that encourages liquid and debris to separate into a transparent bowl. The filter element and bowl need enough capacity for the environment, and the drain must remain accessible.
Moisture trap, regulator and gauge: three different jobs
| Component | Main job | What it does not prove |
|---|---|---|
| Moisture trap / water separator | Collects liquid water and particles from the compressed-air stream | It does not remove all water vapor or replace tank draining |
| Pressure regulator | Controls outlet pressure delivered toward the hose | Its setting does not guarantee enough compressor airflow |
| Pressure gauge | Displays pressure at its measurement point | A static reading does not equal pressure while spraying |
| Air tank | Stores air and can smooth delivery and reduce rapid motor cycling | It can also collect condensate and still needs maintenance |
| Point-of-use mini filter | Adds final liquid protection close to the airbrush | It does not correct an overloaded or unmaintained primary system |
Where should an airbrush moisture trap be installed?
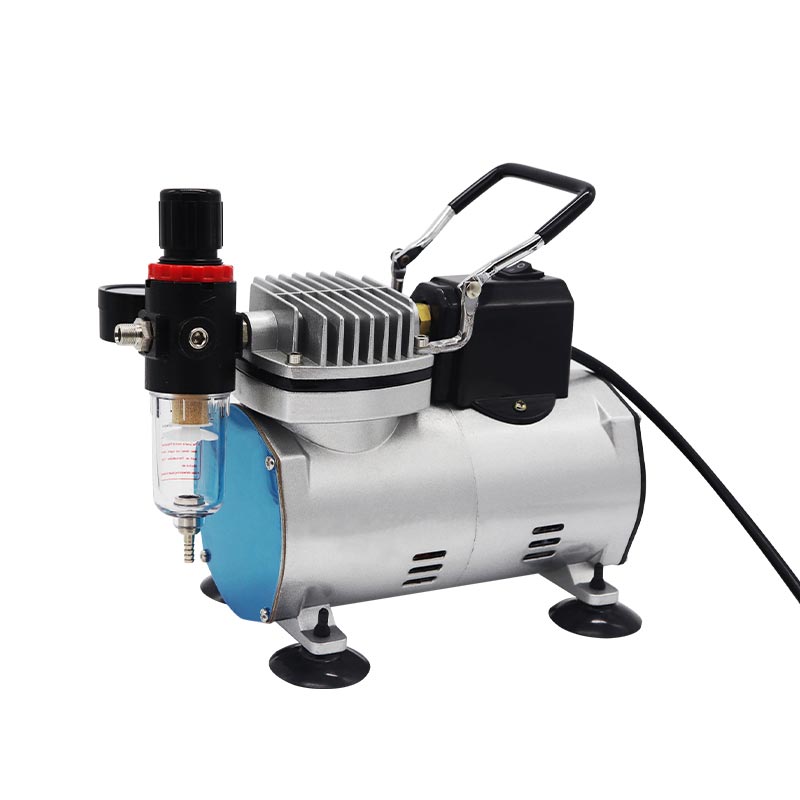
The common primary location is at the compressor outlet as part of a regulator-filter-gauge assembly. This keeps the bowl visible and lets the operator adjust working pressure before air enters the main hose. Follow the airflow arrow and the compressor maker’s approved fitting arrangement.
Mount the trap vertically. A bowl leaning sideways may not separate or drain as designed. Keep enough clearance below the drain valve for a cloth or container. Avoid placing the unit where it will be struck by tools or exposed to incompatible solvent.
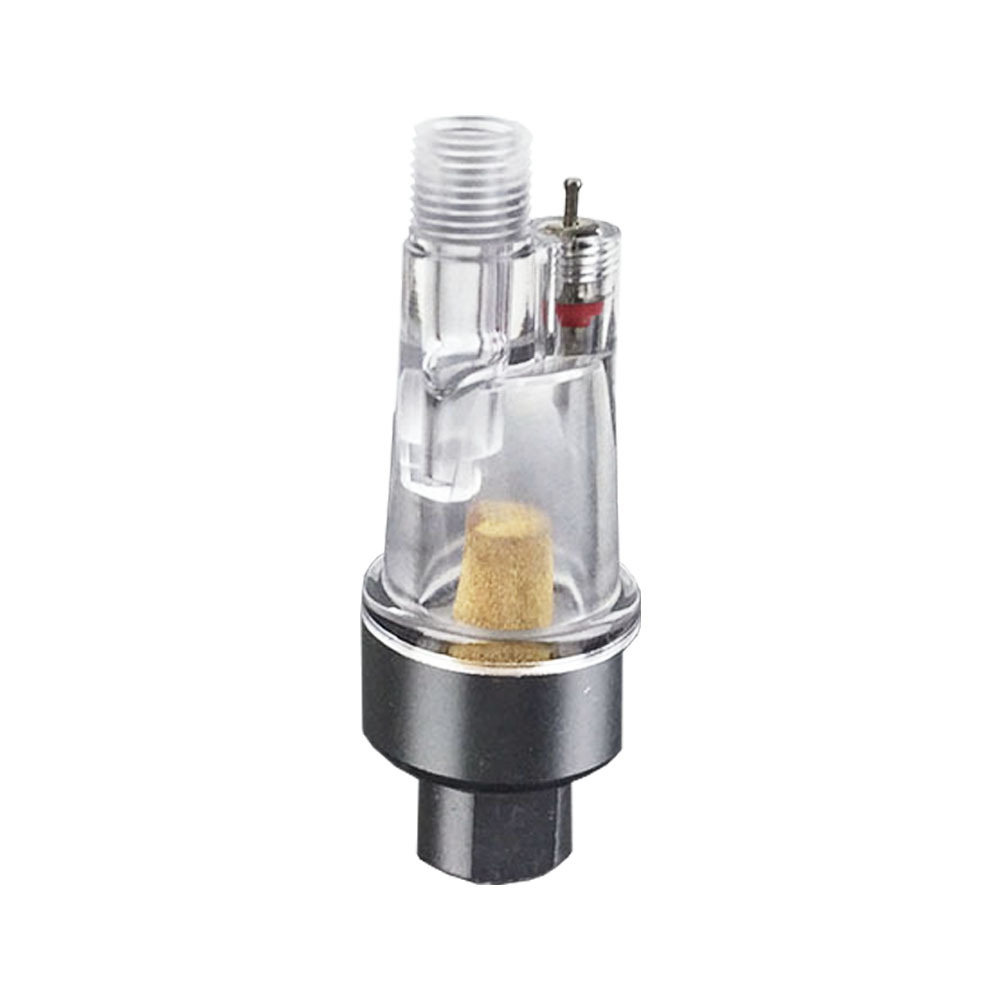
A secondary pistol-grip or inline filter close to the airbrush can help when the main hose is long, the room is humid, or condensation forms downstream of the primary trap. It should be treated as a final defense, not an excuse to leave water in the compressor tank or primary bowl.
How to connect the complete air path
- Confirm voltage and compressor condition. Use the correct market version and inspect the cord, hose and fittings.
- Install the regulator-filter assembly. Use only approved threads, adapters and sealing method.
- Check the airflow direction. Compressor air must enter the marked inlet and leave toward the hose.
- Keep the bowl upright and protected. Do not support the compressor by the filter assembly.
- Connect the intended hose and airbrush. Avoid sharp bends and unnecessary small adapters.
- Perform a leak check. Follow the equipment manual; do not use a flammable leak-testing material.
- Set working pressure. Hold the airbrush trigger down for air while adjusting the regulator.
- Test with water first. Confirm clean dry delivery before loading the target coating.
For the rest of the setup, use our working-pressure guide and mini air compressor selection guide.
Route humid-air problems into an air-system application brief
An airbrush moisture application brief should describe the spray task and environment before naming a filter. A buyer who reports water in the hose may need a compressor, regulator, moisture-control accessory or complete kit review, and the right path depends on the target application, session length and destination market.
| Brief field | What to record | Where it goes next |
|---|---|---|
| Application | Model, nail, cake, makeup, touch-up or another workflow, plus the material being sprayed | Use the application request brief matrix to choose the right product route. |
| Air path | Compressor, tank if fitted, regulator, trap, hose, point-of-use filter and paired airbrush | Compare the full path before changing one accessory. |
| Environment | Humidity, room temperature, elapsed spraying time and when the first wet spot appeared | Keep unresolved fields open; do not turn a humid-room incident into a universal dryness claim. |
| Open question | Whether the buyer needs a compressor review, a kit sample, a replacement filter or an OEM air-system package | Send it through the air-system inquiry form with the recorded setup. |
How and when to drain the moisture trap
Inspect the transparent bowl before every session and periodically while spraying. Drain frequency cannot be one universal number because humidity, temperature, airflow and session length vary. In a humid workshop, droplets can form much faster than in a climate-controlled room.
Use the exact drain procedure supplied with the compressor or filter. In general, stop work, secure the airbrush, turn off power and release pressure as instructed. Hold an absorbent cloth or suitable container at the drain so water does not spray onto equipment or the workpiece. Do not remove a pressurized bowl.
At the end of a session, release stored moisture from the trap and air tank where the model includes a drain. Check that the bowl is clean, the seal is sound and the drain closes fully before the next use.
Signs that water is reaching the airbrush
| Symptom | Why moisture is possible | Other causes to rule out |
|---|---|---|
| One clear or pale wet spot appears during a pass | A water droplet may have travelled through the hose | Wet paint in the cap, over-reduction or surface contamination |
| Fault starts after a long warm session | More condensation forms as the system heats and cools | Compressor thermal limits, tip-dry or paint settling |
| Visible droplets collect in the clear bowl | The trap is doing its job but may need draining | Check that the drain and filter element are serviceable |
| Water is visible inside a transparent hose | Condensation has moved downstream | Drain, dry and inspect the entire air path before painting |
| Orange residue appears in tank drainage | Internal moisture may be contributing to corrosion | Follow the compressor maker’s inspection and service guidance |
When moisture creates a pulsing-looking fault
Airbrush pulsing moisture in hose should be recorded by time and location. A hose that becomes wet after the compressor warms can cause intermittent droplets that look rhythmic, especially during long passes. Drain only by the approved procedure, keep the original air path unchanged for the baseline card, then compare with the spray-card pulsing test before blaming the nozzle or paint.
Water is only one cause of an uneven pattern. If the paint itself is spattering, inspect tip-dry, viscosity, nozzle and pressure using our airbrush spitting troubleshooting guide.
Humidity, hose length and room temperature
High relative humidity supplies more water vapor to the compressor. Hot compressed air can carry that vapor until it cools in the hose. Long lines and cool floors can therefore create downstream condensation even when the primary trap looks nearly dry.
Keep the compressor in a ventilated location and within the temperature range in its manual. Avoid coiling a warm hose tightly against a cold surface. If the process is sensitive, record room temperature and humidity with the approved spray settings.
For demanding humid environments, validate a primary regulator-filter plus a secondary point-of-use trap. The final configuration should be tested during a session long enough to reproduce the customer’s real duty cycle.
Does an air tank replace a moisture trap?
No. An air tank may let some water condense before air reaches the regulator, but that water remains inside until drained. The tank and moisture trap perform related but different jobs. A tank can also smooth airflow and allow quieter stored-air operation, depending on the compressor design.
A tank-equipped system needs an accessible drain, clear maintenance instructions and corrosion-resistant construction appropriate to its intended use. Buyers should not approve a compressor only because its maximum PSI looks high. Delivered airflow, regulation, heat, noise, duty cycle and moisture management must be tested together.
Filter element and bowl maintenance
Inspect the element at the interval stated by the manufacturer, more often when the compressor runs in dusty or humid conditions. Reduced airflow, visible contamination or damaged seals can indicate service is needed. Replace parts with the correct rating and material compatibility.
Clear bowls may be sensitive to particular cleaners and solvents. Do not wipe them with an unknown aggressive solvent. A clouded, cracked or damaged bowl should be replaced before the system is pressurized again. Never bypass a damaged filter assembly merely to complete a job.
Moisture-control checklist for OEM airbrush kits
- State whether the compressor includes a moisture trap, regulator and gauge.
- Document inlet and outlet thread standards and every included adapter.
- Verify working pressure at the airbrush with the final hose and filter installed.
- Run an extended humid-condition test rather than only a short dry-room test.
- Confirm bowl capacity, visibility, upright mounting and drain access.
- Test the tank drain and include safe end-of-session instructions where applicable.
- Check that packed fittings cannot strike or crack the filter bowl in transport.
- Provide replacement element, bowl, O-ring and hose part numbers.
- Add a point-of-use filter option for markets with high heat and humidity.
When the system is sold as a complete kit, compatibility matters more than the individual component count. Review the airbrush kit supplier checklist for hose, fitting, holder, cleaning and packaging validation.
A repeatable moisture-control sample test
- Record the environment. Note room temperature and relative humidity.
- Use the production air path. Test the exact compressor, tank, regulator, trap, hose and airbrush.
- Begin with drained equipment. Record the empty condition of the tank and bowl.
- Set working PSI under airflow. Save both the starting value and any drop during a sustained pass.
- Run the target session. Include normal pauses and motor cycling.
- Inspect at fixed intervals. Record droplets, bowl level, hose condition and spray-card changes.
- Drain and measure. Follow the safe procedure and compare units consistently.
- Repeat on several samples. Approve a stable production result, not one hand-selected unit.
Airbrush moisture trap FAQ
Do I need a moisture trap for an airbrush compressor?
It is strongly useful whenever compressed air can carry condensation or debris, especially in humid rooms and longer sessions. Many purpose-built airbrush compressors include a trap and regulator assembly.
Why is there no water in my moisture trap?
The air may be dry, the session short, or condensation may occur farther downstream. Also verify that the trap is installed in the correct direction and upright. An empty bowl does not by itself prove the air is dry everywhere.
Can I put the trap next to the airbrush?
A point-of-use filter can add final protection, but the primary trap normally remains near the compressor outlet. Check weight, grip comfort, pressure drop and fitting compatibility.
How often should I drain it?
Inspect before and during each session and drain according to the manufacturer’s instructions whenever droplets collect. Humidity and runtime determine the real interval.
Can a dirty moisture filter reduce PSI?
Yes. A restricted element or poorly sized assembly can reduce delivered airflow and working pressure. Compare the gauge under airflow and service the element according to its rated procedure.
Keep an airbrush moisture troubleshooting log
For water in airbrush hose after long sessions, record where the liquid was observed and when the first affected pass occurred. An empty primary bowl and a wet hose are different observations, not proof that a filter failed. Separate tank, primary bowl, hose and point-of-use filter notes in the blank moisture log.
Note room conditions, elapsed use, pauses, the original air-path configuration and any recurrence after maintenance. If the room or hose arrangement changes at the same time as a filter, the comparison cannot isolate which change mattered. Record that limitation instead of calling the new part a proven fix.
Airbrush filter drain vs tank drain: keep the procedures separate
The two valves are not interchangeable maintenance instructions. A model may specify releasing collected filter water through its designated valve, while tank maintenance follows a separate shutdown and pressure-release sequence. The Sparmax TC-610H Plus manual distinguishes these operations. Use your exact compressor and filter manuals; do not remove a pressurized bowl or infer a safe procedure from appearance.
This is an observation record, not a dryness certificate or approval test. Relate recurring incidents to the working-pressure log and share the air-path references through the buyer brief before changing the kit specification.
Validate moisture-trap placement with one controlled record
Use an airbrush moisture trap placement record to identify every point where compressed air cools or changes direction: compressor outlet, tank where fitted, regulator-filter assembly, main hose, connector and airbrush. Follow the maker’s approved arrangement and airflow direction. A primary separator near the compressor and an airbrush inline moisture filter setup near the tool perform different jobs, so record them as separate components rather than describing both as “the filter.”
| Inspection point | Before the session | During and after the session |
|---|---|---|
| Tank and primary bowl | Drain condition, bowl orientation, seals and approved connection order | Elapsed time to visible droplets and the manual-based drain action |
| Main hose | Routing, length, low points and room conditions | Where liquid first appears for airbrush hose condensation troubleshooting |
| Point-of-use filter | Correct direction, secure fit and comfortable handling | Droplets, restriction symptoms and whether the event repeats |
| Spray card | Dry baseline at recorded working pressure | Time and air-path observation associated with the first wet spot |
An airbrush moisture trap inspection checklist should keep the original configuration unchanged for the baseline run. If moisture appears, change one approved variable at a time and repeat the same session pattern. This will not create a universal drain interval, but it gives the buyer a traceable observation instead of an unsupported promise that a particular accessory keeps every system dry.
Iwata’s official setup guidance shows a compressor, hose and compatible adapter as one equipment path, while GSI Creos notes that condensation can also occur inside an air hose and points users to model-appropriate drain or moisture-control components. Use those principles only as context; the exact equipment manual remains the controlling instruction.
Record working pressure with the method in the compressor acceptance cycle, then verify the assembled package with the kit air-path commissioning check.
Technical references: Iwata equipment setup and the GSI Creos product FAQ. Do not substitute these general references for the exact compressor, filter and hose instructions.
Review wet-hose incidents by session, not by accessory name
An airbrush wet hose incident record should describe the session that produced the first wet spot: room condition, compressor state, hose route, filter placement, working pressure, elapsed time and whether the airbrush was spraying paint or only air. If the report only says “water came from the hose,” it is not enough to decide whether the next action is draining, rerouting, adding a point-of-use filter or changing the compressor package.
| Session field | Evidence to keep | Boundary |
|---|---|---|
| Moisture trap bowl orientation check | Upright position, airflow direction, drain state and whether the bowl was installed according to the exact manual | Do not infer safe bowl handling while the system is pressurized. |
| Point of use airbrush filter log | Tool-end filter direction, added restriction symptoms, comfort in hand and whether droplets appear before or after it | Do not describe a handle filter as a substitute for tank or primary-bowl maintenance. |
| Compressor humidity session review | Room humidity context when known, compressor warmth, tank or bowl drain note and repeated-session result | Do not convert one humid-room result into a universal dry-air guarantee. |
Connect the session review to the compressor release evidence, the pressure recovery handoff and the kit first-use support file. This keeps moisture control as part of the verified air path rather than a loose accessory claim.
Treat dry air as part of the spray specification
An airbrush moisture trap is a small component with a large effect on repeatability. Install it in the correct direction, keep it upright, read pressure under airflow, drain it safely and validate the complete compressor-to-airbrush path in the customer’s real environment.
YIDIAN develops mini compressors, airbrushes and complete kits for OEM and private-label programs. Share your target market, humidity, session length, working PSI and order quantity to define a moisture-control and sample-testing plan.
Technical references: Iwata compressor and moisture-control guide, Iwata equipment setup instructions and an Iwata compressor maintenance manual.