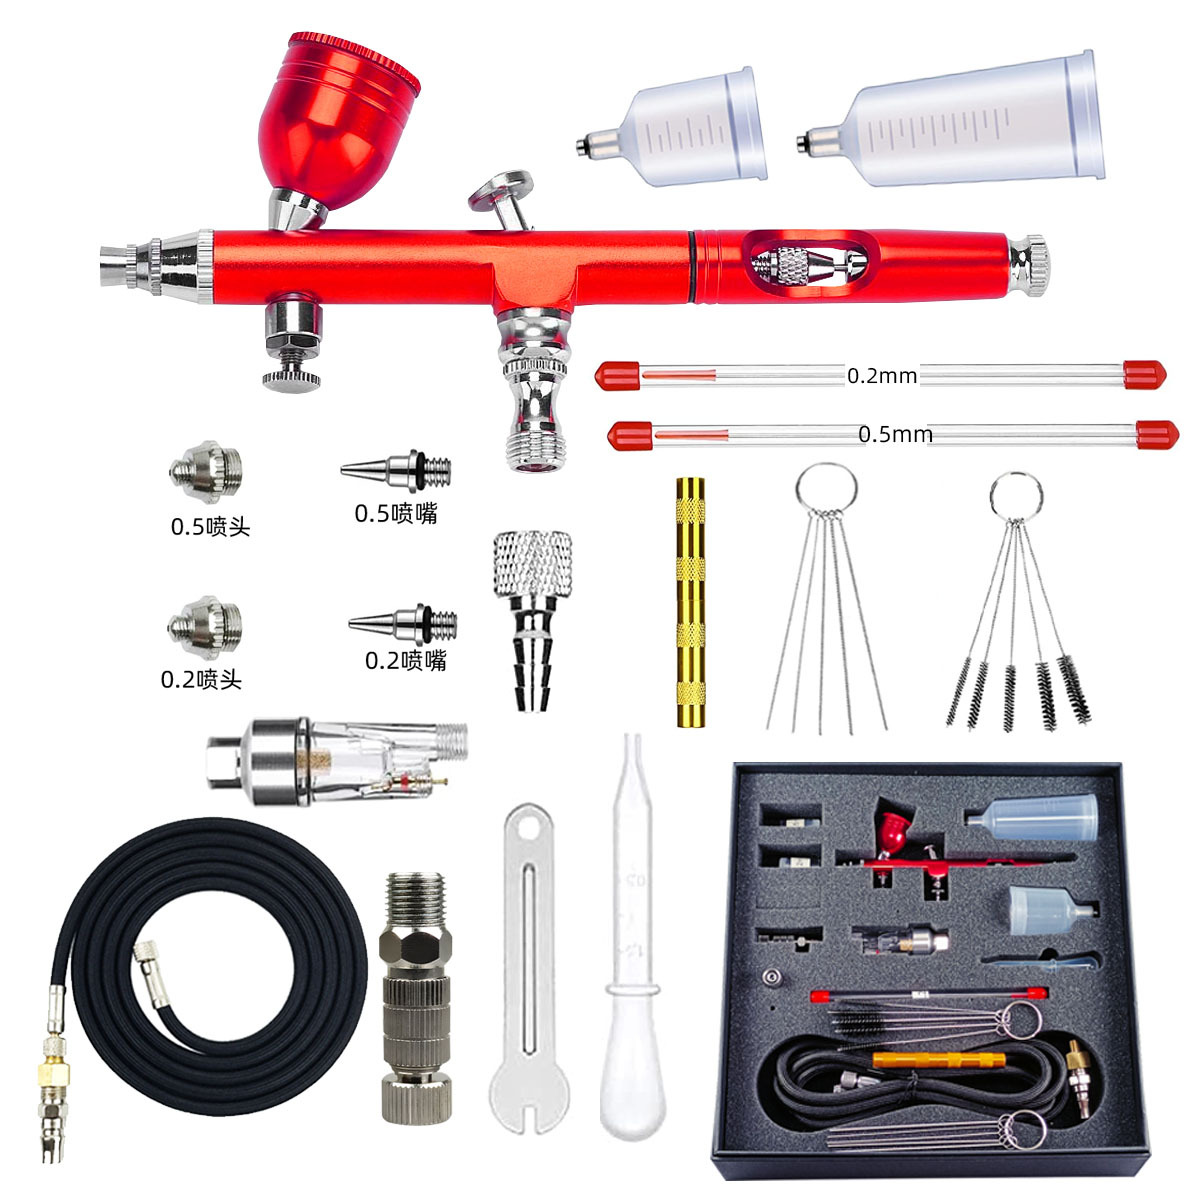
Learning how to clean an airbrush is part of learning how to produce a repeatable spray. The right routine removes material before it dries while protecting the needle, nozzle, seals and threads from unnecessary handling.
This airbrush cleaning guide separates a quick color change, an end-of-session clean and a fault-driven deep clean. It is written for users as well as distributors and private-label brands preparing maintenance instructions, accessories and sample tests.
Why cleaning quality changes spray quality
Paint passes through narrow internal areas before it reaches the needle tip. Residue in the cup, passage, nozzle or cap can delay material flow, deflect the pattern or release as a sudden spit. A dirty front end can look like a pressure problem, while a damaged nozzle caused by aggressive cleaning can create a permanent leak or off-center spray.
A useful cleaning process has two goals: remove the current material and return the airbrush to a verified baseline without damaging precision parts. More disassembly does not automatically mean a cleaner or better-maintained tool.
Airbrush construction, seals and approved cleaners differ. Use the airbrush manual, coating guidance and cleaner safety data as the authority for compatibility, ventilation, personal protection and disposal.
Choose cleaner by material and seal compatibility
Use a cleaner or thinner approved for the coating and airbrush. Water may help with some water-based materials but will not remove every binder after it cures. Strong solvent is not a universal solution and can damage unsuitable seals, coatings or plastic accessories.
Before adding a product to a retail kit or cleaning SOP, confirm:
- the coating categories the cleaner is intended to remove;
- compatibility with the airbrush seals, finish and internal materials;
- required ventilation, gloves, eye protection and respiratory controls;
- flammability, storage and disposal requirements;
- whether users should spray cleaner into an approved cleaning pot or exhaust system.
Never mix cleaning chemicals unless their manufacturers explicitly allow it. Keep ignition sources away from flammable vapor and do not assume a low-odor product is safe to inhale.
Use the least invasive cleaning level that works
| Cleaning level | When to use it | Typical scope |
|---|---|---|
| Color-change flush | Changing compatible colors during one session | Empty cup, wipe accessible residue, flush passage, verify on test card |
| End-of-session clean | Work is finished or the airbrush will be stored | Thorough cup and passage clean, needle wipe where instructed, front-end inspection |
| Fault-driven deep clean | Verified restriction, dried material or persistent spray fault | Manual-guided disassembly of affected parts, inspection and controlled reassembly |
Frequent full teardown increases the chance of bent needles, lost seals, damaged threads and overtightened nozzles. Escalate only when the previous level does not return the spray to baseline.
Color-change flush: a practical sequence
- Remove remaining material. Return or dispose of it only as the coating instructions allow.
- Wipe the cup. Use a lint-free material and avoid pushing residue into the paint passage.
- Add a small amount of approved cleaner. Agitate gently with a suitable soft brush if the manual permits.
- Flush into an approved cleaning pot or exhaust area. Avoid creating uncontrolled airborne mist.
- Repeat only as needed. Cleaner running clear is useful, but the final proof is a stable test spray.
- Load the next color and test away from the work. Confirm that the old color and cleaner are gone before returning to the project.
Backflushing is recommended for some airbrushes and discouraged for others. Do it only when the product instructions permit it, and never block the front with a finger where a needle or sharp component can cause injury.
End-of-session airbrush maintenance
At the end of the session, remove all material and complete the approved flush. Wipe the cup and exposed needle-tip area carefully. If the manual instructs the user to remove the needle, protect the tip, note the removal direction and wipe from the rear toward the point so material is not pulled deeper into the body.
Inspect the front assembly under good light. Dried material often collects on the needle tip, inside the cap or around the nozzle opening. Use only brushes or soft tools sized for the part. Do not push a hard object through a precision nozzle or use leverage that can flare the opening.
After reassembly, add the recommended safe test liquid or coating and make dots, lines and a short gradient on a clean card. Confirm that material starts and stops cleanly. An airbrush that looks clean but still spits or sprays off-center requires diagnosis before storage.
Clean, reassemble and prove the spray recovered
For airbrush cleaning after acrylic paint, the pass/fail point is not whether the cup looks clear. Acrylic residue can remain around the needle seat, cap and nozzle opening after the visible color disappears. Use the cleaner recommended by the coating and airbrush makers, then run an airbrush reassembly spray test with a fixed card before the tool goes back into service.
The minimum record should show which cleaning level was used, whether the needle was removed, and whether any front-end part changed position. An airbrush nozzle cleaning needle check means inspecting the needle and nozzle as precision parts, not pushing the needle forward to clear a blocked passage. If the airbrush begins to bubble or spit after reassembly, follow the cup-bubble sequence or the spitting diagnostic card before replacing components.
During airbrush cleaning between color changes, keep the goal narrower: remove enough compatible material to prevent color carryover, then verify on scrap or a card. Save full disassembly for confirmed restriction, end-of-session service or the model manual’s schedule. Brand owners can add this step to the sample inspection checklist so cleaning instructions are tested before packaging is printed.
How to remove and clean the needle safely
The needle is straight, polished and sharply tapered. Even a small bend can shift the pattern. Work over a clear tray so the needle and small parts cannot roll off the bench.
- Release pressure, disconnect the air source and empty the cup.
- Follow the model’s instructions for handle, chuck and needle removal.
- Withdraw the needle smoothly without twisting it against resistance.
- Place it on a lint-free surface where the point cannot contact a hard edge.
- Wipe with approved cleaner from the wider rear section toward the tip.
- Inspect by rotating it under light; a tip that appears to orbit may be bent.
- Reinsert gently through the approved direction and stop when it seats naturally.
Do not force the needle forward to clear a blockage. That can split or deform the nozzle. If resistance remains, stop and inspect the paint passage and nozzle using the manual’s procedure.
Clean the nozzle without turning it into a defect
The nozzle is one of the most delicate and performance-critical parts. Some designs use a tiny threaded nozzle, while others use a self-centering or drop-in arrangement. Use only the specified tool and tightening method.
For a removable nozzle, soak or clean it only with a compatible product and for an approved time. Use a brush, soft pick or cleaning needle specifically sized for the passage if the manufacturer allows it. The goal is to dissolve and lift residue, not scrape metal from the seat.
After installation, confirm nozzle seating, cap fit and a centered spray. Bubbles in the cup, pulsing or material around the nozzle joint may indicate restriction, poor seating or sealing trouble rather than a need for additional force. If backflow remains, follow the step-by-step cup-bubble test before removing more parts.
Build an airbrush cleaning kit around safe fit
| Tool or supply | Purpose | Selection check |
|---|---|---|
| Approved cleaner | Dissolve the intended coating | Coating, seal, finish and safety compatibility |
| Lint-free wipes | Clean cup and needle without leaving fibers | No abrasive surface or loose lint |
| Soft cleaning brushes | Reach cup and suitable passages | Correct diameter; no forced entry |
| Pipette or dropper | Transfer small controlled amounts | Chemical-compatible material and clear use instructions |
| Cleaning pot | Contain part of the flush and overspray | Stable base, correct inlet and replaceable filter where applicable |
| Model-specific nozzle tool | Remove the nozzle where instructed | Correct fit and torque guidance |
| Parts tray | Prevent small items from being lost | Clean, stable and easy to inspect |
A complete kit should not include oversized brushes or generic metal picks merely to increase the accessory count. Our complete airbrush kit supplier checklist explains how to match maintenance tools with the airbrush, compressor and packaging.
Diagnose spray symptoms after cleaning
| Symptom | Possible cleaning-related cause | Next check |
|---|---|---|
| Paint spits on restart | Residue in cap, wet cleaner, loose nozzle or damaged needle | Inspect front assembly and repeat dots with safe test liquid |
| Spray points to one side | Contaminated cap, bent needle or damaged nozzle | Clean the cap, rotate-inspect the needle and check centering |
| Bubbles appear in cup | Restricted nozzle area, poor seating or seal problem | Stop, release pressure and inspect the nozzle assembly |
| Material leaks with air only | Needle not seated, residue at seat or damaged needle-nozzle pair | Clean and inspect mating parts; do not force the needle |
| Trigger feels sticky | Material entered trigger or air-valve area, or unsuitable lubricant was used | Follow model-specific service instructions before further teardown |
| Flow remains weak | Passage residue, incompatible paint preparation or air restriction | Separate material-path and air-supply tests |
Change one variable at a time. Replacing several parts, raising pressure and thinning paint together may hide the actual cause. The model-painting setup and troubleshooting guide provides a five-part spray test for comparing results.
If flow returns after cleaning but blocks again during the same session, move from routine maintenance to the repeat clogging diagnostic. It separates residue left after cleaning from paint preparation, tip-dry, nozzle suitability and cleaner compatibility.
For a symptom-first decision tree, follow the airbrush spitting and splattering guide before moving from routine cleaning to nozzle replacement.
Cleaning evidence to collect before a supplier inquiry
An airbrush cleaning troubleshooting record should show what changed during the cleaning step, not just that the airbrush was cleaned. Note the cleaner used, whether the needle was removed, whether the nozzle or cap position changed, and which test liquid was used after reassembly. This helps a supplier separate a maintenance issue from a part-fit issue without guessing from a short complaint.
If airbrush pulsing after deep clean appears, do not tighten the front end repeatedly. First compare air-only, compatible clean liquid and prepared paint on the same card. If only paint pulses, move to material preparation and clogging checks. If clean liquid also pulses, use the after-cleaning pulsing branch before requesting spare parts.
An airbrush cleaner residue spray test belongs at the end of the service routine when a new material will be loaded immediately. Flush according to the cleaner and coating guidance, then make a short start, a continuous pass and a pause-and-restart line. Keep the card with the sample inspection record if the cleaning SOP is part of a private-label kit review.
Turn cleaning observations into a reusable support pack
An airbrush cleaning evidence handoff is useful when a distributor needs supplier help but has not yet isolated whether the issue is residue, reassembly or part fit. Keep the model, coating family, cleaner category, cleaning level, removed parts and retest liquid in the same note so the next reviewer can repeat the sequence instead of starting from a vague complaint.
During a fast session, an airbrush color change residue record can be as simple as one photo of the wiped cup, one line noting the previous and next material, and one short sample line after flushing. If color carryover appears, keep that card with the post cleaning spray card review before deciding whether the SOP, material reduction or nozzle selection needs work.
Add an airbrush cleaner compatibility note beside the maintenance instruction when a kit includes brushes, seals, cups or accessory bottles. The note should state the cleaner category reviewed, the part surfaces exposed during normal use and any unresolved restriction that must be confirmed by the buyer or coating maker before the page, manual or packaging copy is finalized.
A simple preventive maintenance schedule
| Frequency | Maintenance action | Record or result |
|---|---|---|
| Every color change | Empty, wipe and approved flush | No previous color; clean test spray |
| End of session | Thorough passage clean and front-end inspection | Stable dot, line and restart before storage |
| When performance changes | Diagnose air, material and component causes separately | Symptom, action and retest result |
| Periodic, per manual | Inspect seals, threads, trigger movement and approved lubrication points | Wear items identified before failure |
| Before repeat-order approval | Compare production sample after clean and reassembly | Matches approved control sample and test card |
Lubricate only the points and with the product identified by the airbrush manufacturer. Excess or incompatible lubricant can migrate into the paint path, affect coatings or collect contamination.
How brands should test cleaning before production
For a private-label airbrush, maintenance is part of product quality. Ask a new operator to use only the supplied manual and kit tools. Observe whether the person can empty, flush, remove the allowed components, clean, reassemble and return the airbrush to its original spray baseline.
- Number the sample and photograph the assembled front end.
- Run a controlled dot, line, gradient and restart test.
- Spray the intended coating for the expected session length.
- Clean using only the proposed retail instructions and accessories.
- Count handling steps, note confusion and record cleaning time.
- Repeat the original spray card under the same settings.
- Inspect the needle, nozzle, seals and threads for handling damage.
If performance does not return, determine whether the problem is product design, tool fit, cleaner compatibility or instruction quality. Fix the process before printing packaging or scaling production.
Write maintenance instructions that users can follow
A good manual identifies the parts by the same names used on the replacement packs. It separates routine cleaning from advanced service, states which components should not be removed by a beginner and warns against forcing the needle or nozzle.
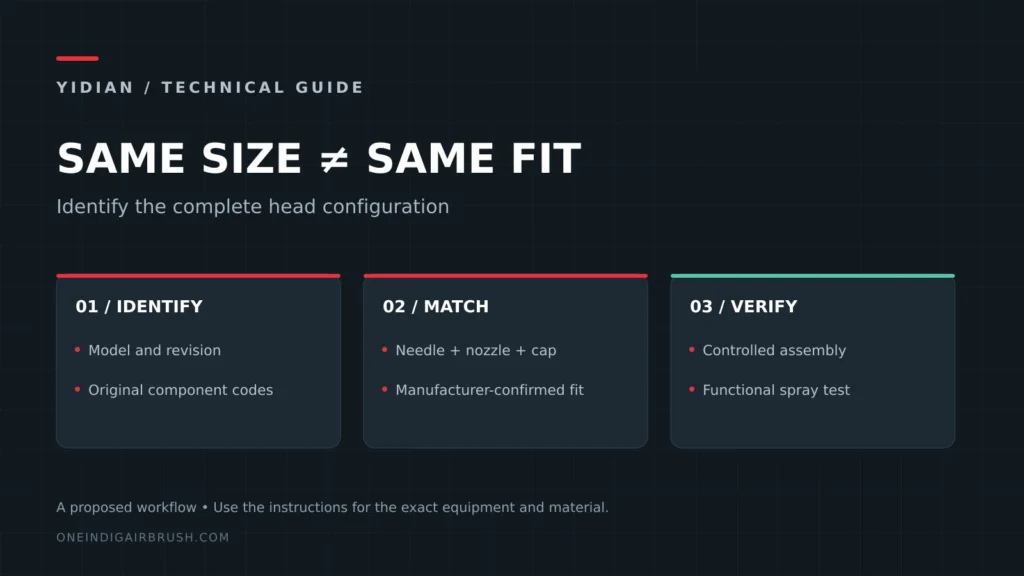
Include diagrams for removal direction and part order, approved cleaner categories, safety precautions, test-spray steps and a troubleshooting path. Add the exact model and nozzle size so users do not install a visually similar but incompatible part.
For a broader sourcing process, use the private-label airbrush manufacturing checklist to lock the product, manual, packaging and service parts by revision.
Frequently asked questions
Should I fully disassemble an airbrush after every use?
Not unless the product manual requires it. A correct end-of-session clean may be enough. Full teardown should be driven by the design, material and verified need because unnecessary handling can damage precision parts.
Can I use any solvent to clean an airbrush?
No. The cleaner must be compatible with the coating, seals, internal materials and finish. Follow the airbrush and coating guidance plus the cleaner safety data.
Why does my airbrush spit after I cleaned it?
Possible causes include cleaner or residue trapped in the cap, an incompletely seated needle, a loose or damaged nozzle, or contamination left in the passage. Inspect and retest systematically rather than immediately increasing pressure.
What should an airbrush cleaning kit include?
It should include only compatible, correctly sized tools and clear instructions. Common items are lint-free wipes, soft brushes, a dropper, an approved cleaning pot and model-specific service tools where needed.
Airbrush not spraying after cleaning: record what changed
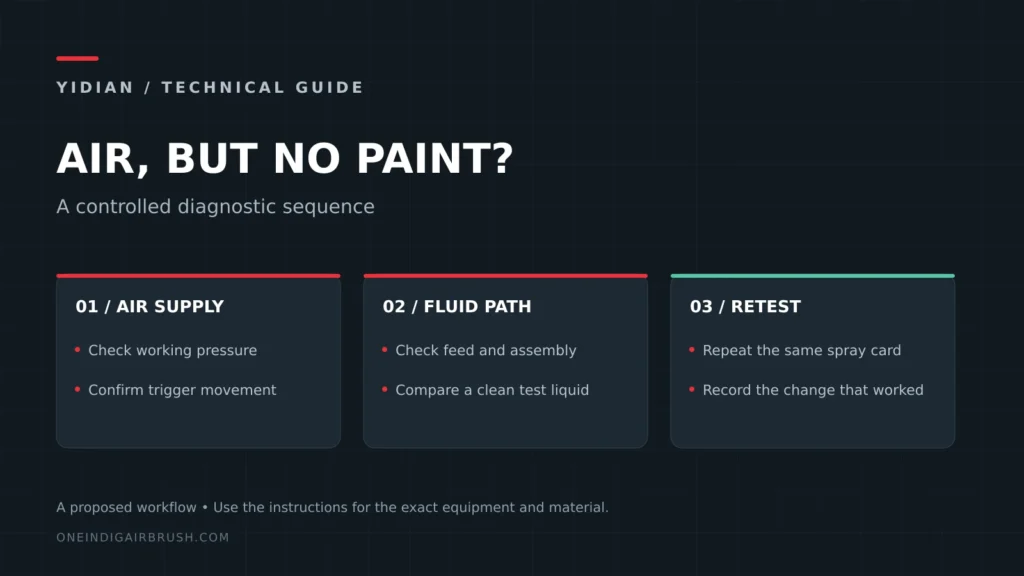
If an airbrush is not spraying after cleaning, check the needle clamp, trigger movement, feed path and cap placement against the model’s reassembly instructions. Then test with an appropriate clean liquid before returning to paint. A cleaning session can reveal an old restriction or introduce a new assembly problem; the two need different fixes.
Use the no-paint troubleshooting table to separate an air-only symptom from a complete air-supply failure. If any service component was replaced, verify its exact model and part reference with the needle/nozzle compatibility checklist. Do not force the needle forward or tighten a small nozzle beyond the manufacturer’s instructions to compensate for uncertain fit.
Route a cleaning kit sample request from the evidence
An airbrush cleaner residue sample route should begin with the residue type, target coating, model or nozzle family, cleaning level already attempted and the spray-card result after cleaning. That record helps a supplier decide whether the buyer needs routine cleaning tools, a cup/accessory change, a model-matched service part or a clearer instruction sheet.
Use an airbrush maintenance accessory sample route only after the cleaning record names the failed step. If the issue is dried color in the cup, compare the Paint Cup Series. If the issue is cleaning tool fit or retailer kit composition, review the Airbrush Cleaning Kit. If clean liquid still does not reach the card, attach the no-flow evidence pack before sending a parts inquiry.
For wholesale or private-label support, keep the request specific: required cleaner category, accessory pack target, user skill level, packaging language and unresolved fault. Then send the maintenance accessory request without treating an untested accessory as a guaranteed repair.
Return the airbrush to a verified baseline
The best answer to how to clean an airbrush is a controlled routine: use the correct cleaner, handle the needle and nozzle as precision parts, escalate disassembly only when needed and confirm the result on a test card.
Send the airbrush model, cleaner used, residue symptom, replaced part if any, spray-card result after cleaning and whether the request is for a single sample, spare-part list or kit accessory plan. This keeps cleaning support separate from unconfirmed commercial terms.
YIDIAN supplies gravity-feed airbrushes, replacement components, mini compressors and private-label kits with configurable maintenance accessories. Review our airbrush and accessory range, then send your target material and kit requirements for sample planning.